Managing your team on Conjointly
By uniting members into a team, all team members can enjoy the following benefits and get more value from market research:
- Enhanced security with centralised team authentication settings.
- Licence management for all team members.
- Simplify payment processing by using common payment methods and prepaid balances for all team members.
- Easier tracking of team expenses by viewing the team’s balance and invoices.
- Maintain continuity and efficiency by easily adding or replacing team members.
Inviting members to your team
By default, you are the only member of your team. Follow these steps to invite other users to join your team:
- Go to Manage members.
- Click on the button.
- On the pop-up, enter the email addresses of the users you want to invite to your team, with each address on a separate line.
Please note that each user can only belong to one team, and you can only invite users who are not already members of another team. Once a team member joins your team, they will never be able to leave (but you can disable their access to the team at any time).

Managing team members
Team leaders can manage the full list of team members on the Manage members page. They can assign leader or member roles, activate or deactivate members, view member experiments, invite new members, and revoke invitations.

Role-based access for leaders and members
This table shows the different levels of access that leaders and members have to manage team, payments, balance, and authentication.
| Access | Leaders | Members |
|---|---|---|
| Managing the team | ||
Add a team member | Available | Not available |
Remove/deactivate a team member | Available | Not available |
Access to team member experiments | Available | Not available |
View the list of team members | Available | Available |
Change the team’s default currency | Available | Not available |
| Purchasing Conjointly licence | ||
Purchase licences for the team | Available | Not available |
| Available | Not available | |
Undo cancellation of recurrence of licence | Available | Not available |
| Working with payment methods | ||
Add a payment method | Available | Available |
Remove a payment method | Available | Not available |
View available payment methods | Available | Available |
Using payment methods to pay for additional services | Available | Available |
| Working with team balance | ||
View the team balance | Available | Available |
Top-up the team balance | Available | Available |
Add recurring payments | Available | Available |
Remove recurring payments | Available | Not available |
Pay for additional services using the team balance | Available | Available |
| View the team invoices | Available | Available |
| Configuring authentication settings | ||
View the authentication settings | Available | Available |
Add/remove team domains | Available | Not available |
Add/remove sign-in methods for team members | Available | Not available |
Add/remove two-factor authentication for team members | Available | Not available |
Configuring your team’s authentication settings
The Authentication settings let team leaders configure the following:
- Team domains
- Sign-in method for team members
- Option to enable two-factor authentication for all team members
Specifying team domains
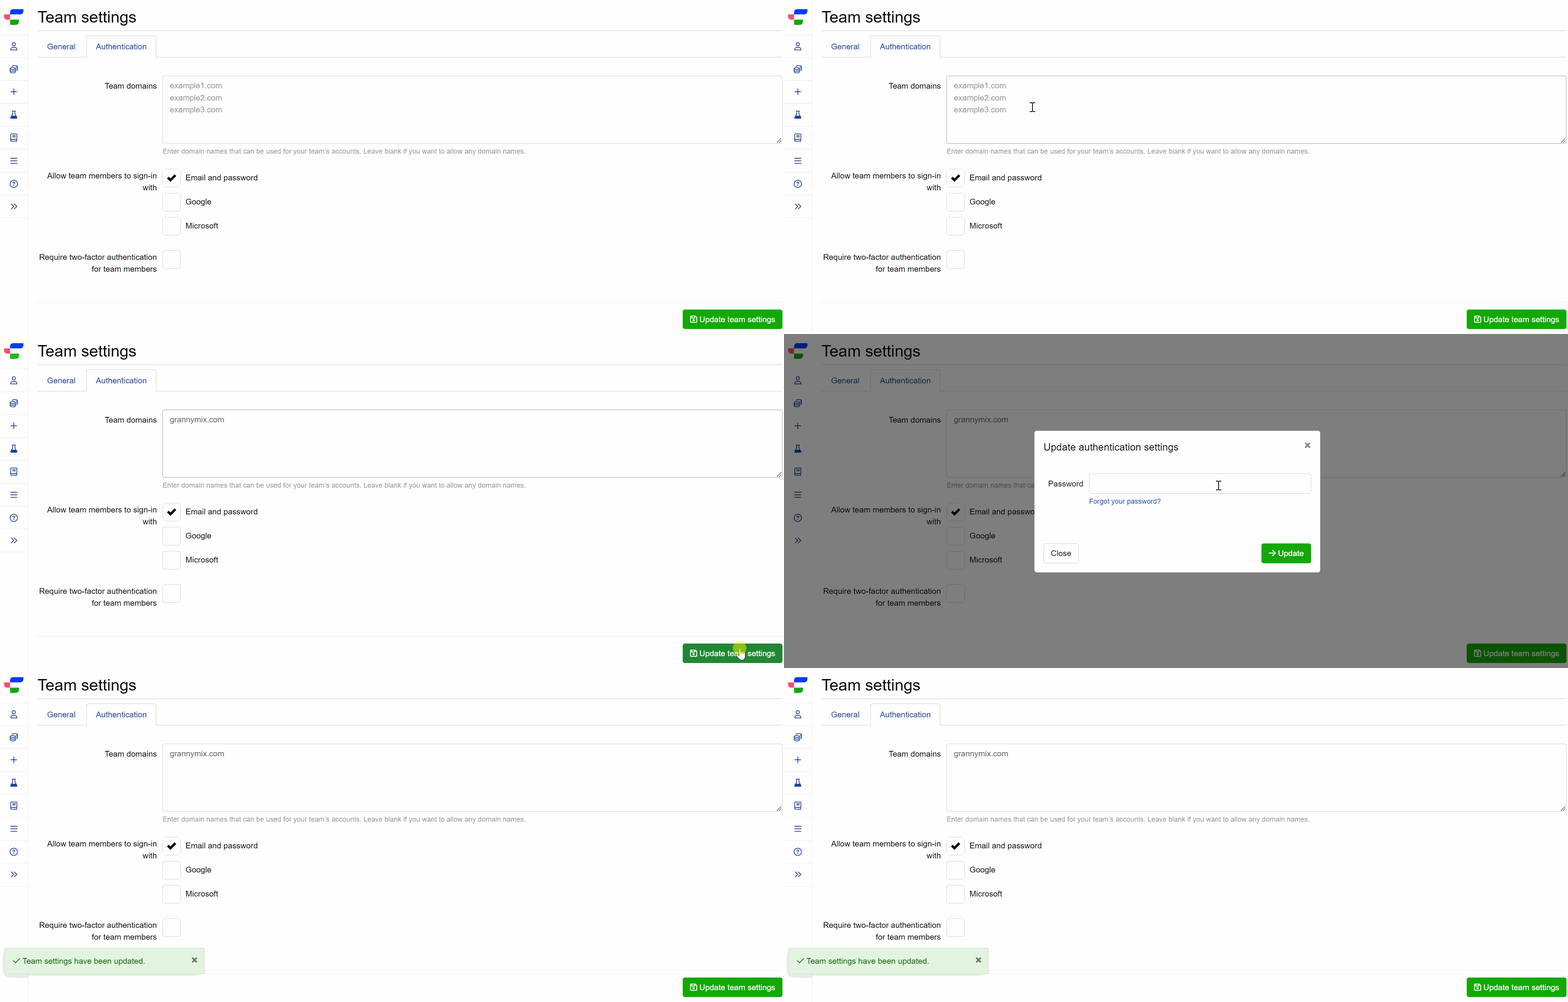
- Enter the domain names that can be used for your team’s accounts on the Team Domains input field. For example,
grannymix.com. By default, the field is blank, allowing any domain names. - Click on .
- Enter your password to save and apply the settings.
Once team domains are specified, only users with matching domains can receive invitations, and join the team.

Selecting the sign-in methods for team members
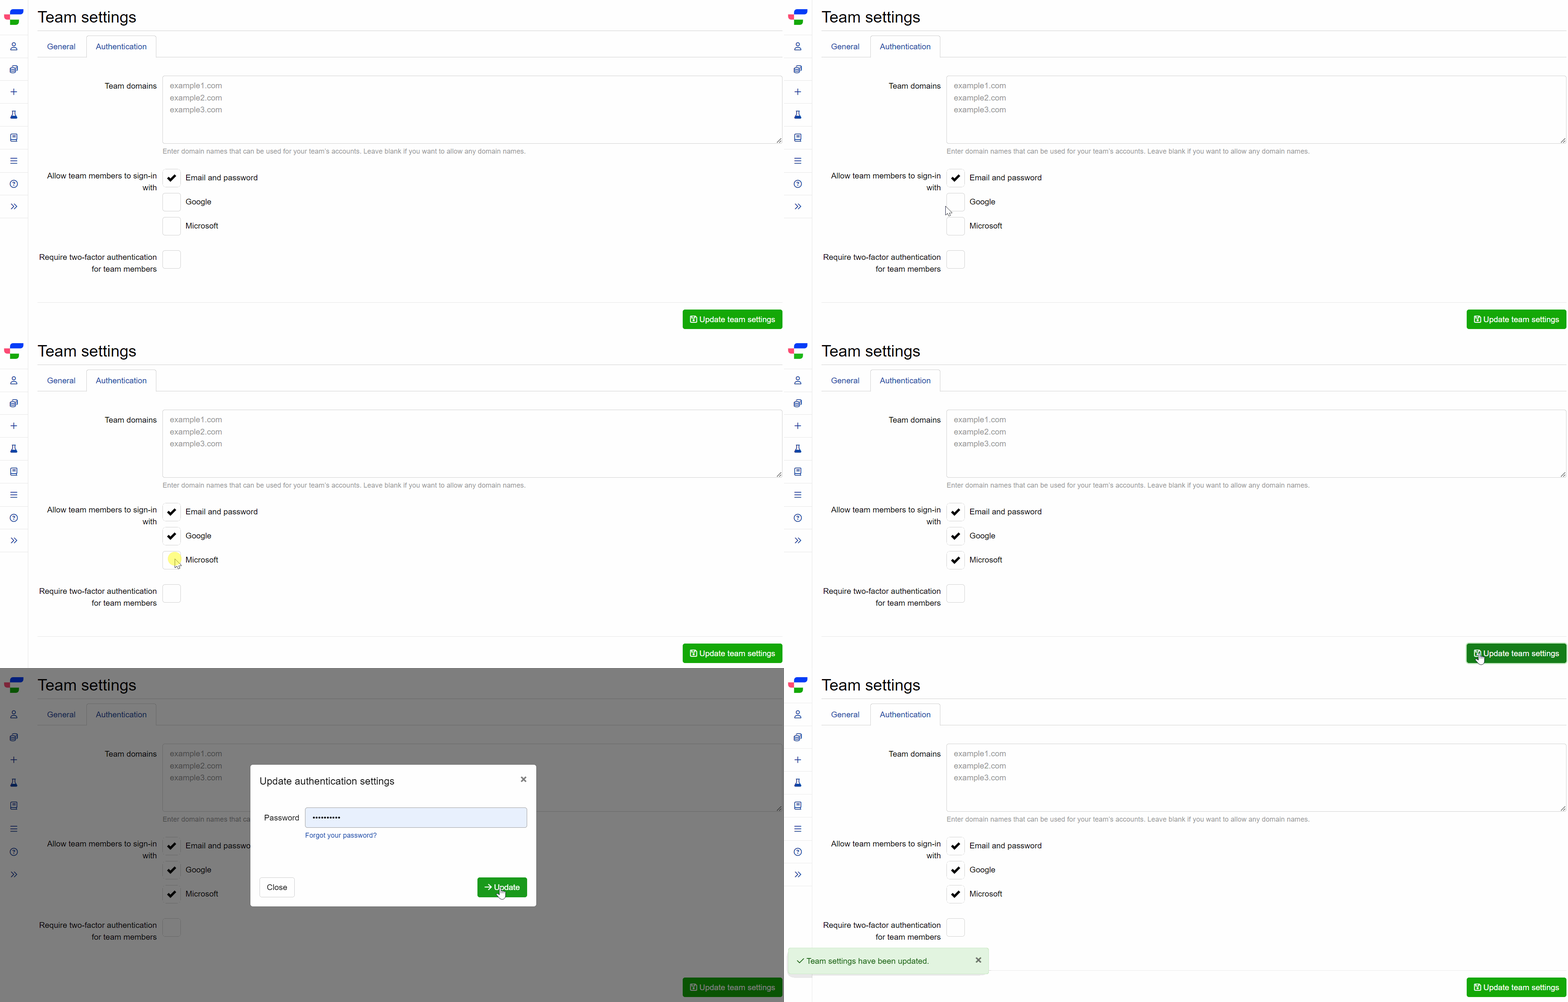
- Enable your team members to sign in with the listed methods by checking the corresponding boxes.
- Click on .
- Enter your password to save and apply the settings.

Enabling two-factor authentication for team members
Conjointly highly recommend enabling two-factor authentication(2FA) to strengthen account security:
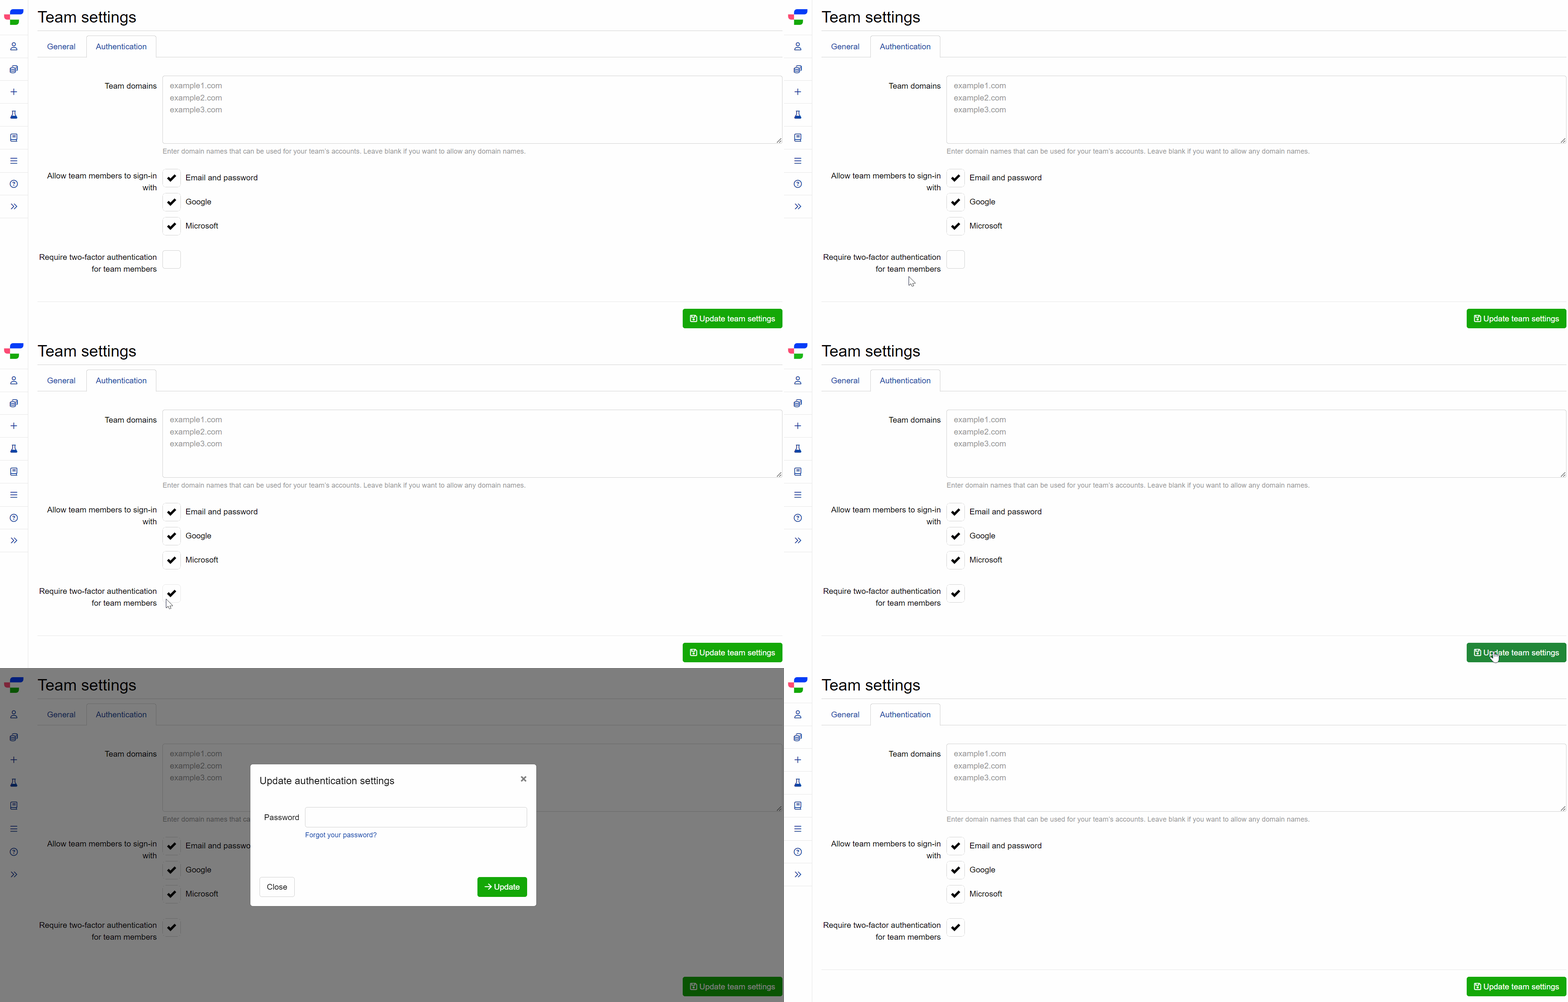
- Check the box to enable two-factor authentication for all team members.
- Click on .
- Enter your password to save and apply the settings.

If 2FA is not currently enabled for your account, you will receive a prompt to enable it.